
Local modification of armor
Local modification of the reinforcements can be done either by directly typing in the descriptive grids for the longitudinal bars and for the stirrups, or graphically, using the tools available in the reinforcement display sheet.
Edit by typing in grids
To modify the displayed reinforcement, you can open the descriptive grids of the longitudinal reinforcement and stirrups for the current beam, via the Data|Reinforcement|Beams menu option.
The two grids can be repositioned on the screen, minimizing the screen area covered and allowing you to switch from one window to the other with a simple click of the mouse.
The modification of the reinforcement takes place within the list sheets, by appropriately varying the data that define the groups of longitudinal bars or the arrangement of the stirrups.
In the longitudinal reinforcement sheet, you can also insert new groups of bars and delete those no longer needed from the list. The commands for inserting or deleting groups are the same as those described for the input sheets. All changes made to the list sheets are reflected in the drawing's graphics window as soon as it is brought back to the foreground. At the same time, the program rechecks the cross-sections of the entire beam and updates the stress diagram, if present.
Graphic modification of armor
The bars and stirrups can also be modified graphically using the commands in the Longitudinal Bars Panel and the Stirrup Panel, shown below. The two panels are opened by clicking the corresponding button on the toolbar.
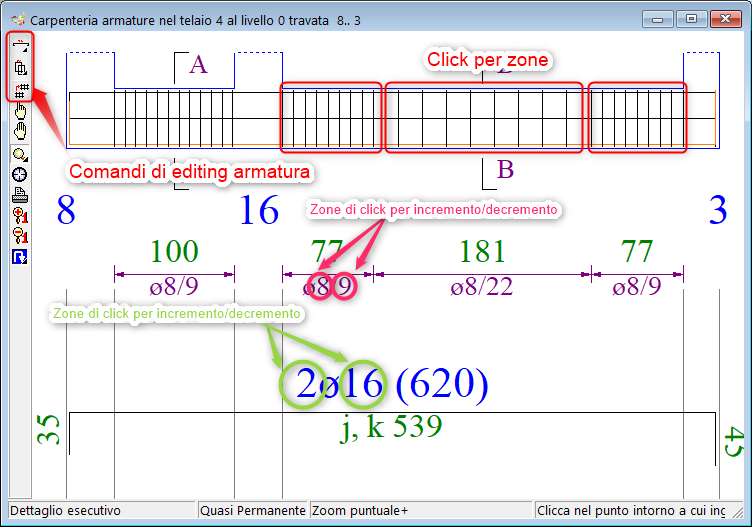
Graphical editing of reinforcement in beams
The editing commands have been grouped into the three buttons on the toolbar.
 Knitting Actions
Clicking the button opens the longitudinal bars panel.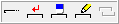
 Insert Iron with Drag Action
The command opens the Current Beam Reinforcement settings panel.

In the panel you can select the iron parameters to insert:
type: type of iron (straight or shaped),
diameter; from ∅6 to ∅32,
position:side of the section (flap) on which to place the iron, to be selected with the corresponding box.
Once the parameters have been set, proceed by clicking and dragging the mouse in the BOM area from the start to the end zone;
For shaped items, select the initial side of the iron, limiting the choice to the lower and upper edges of the core.
 Action Increase/Decrease the number of rows in an existing bundle
- to increase, right-click on a bundle in the list,
- To reduce, left-click on a bundle in the list.
 Clear iron action
- To delete an iron, click the group in the list.
 Change Diameter Action
- to increase the diameter of the iron click on the text with the right mouse button,
- to reduce the diameter of the iron click on the text with the left mouse button.
 Edit Flap Action
- inactive.
 Actions for stirrups
Clicking the button opens the bracket panel. Modify Stirrup Action
The command opens the Current beam reinforcement settings panel, which contains the Stirruption box.
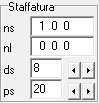
In the box you can set the parameters:
ns: number of closed stirrups on the web and on the two wings, understood as shapes placed side by side in a spacing,
nl: number of ties on the core and on the two wings, understood as shapes placed side by side in an interaxis,
ds: bracket diameter,
ps: stirrup step,
We then proceed by clicking on the pillar outline corresponding to the desired area (foot, centre, head, node).
Alternatively, you can operate in increments/decrements;
- To reduce/increase the diameter, click on the bracket diameter text with the left/right mouse button.
- To reduce/increase the step, click on the step text of the bracket with the left/right mouse button.
 Actions for cloning armor in bulk
This command allows you to clone the reinforcement of a beam, defined as the set of longitudinal bars and stirrups in the three zones (left, centerline, and right). The operation therefore consists of two typical copy/paste steps:
- To copy the reinforcement, hold down Ctrl and click the origin beam.
- To paste, click on the destination beams.
Please note that the operation clones the source reinforcement and therefore completely deletes the previous reinforcement on the destination beams.
Constraints on changes
Note that the program imposes only formal constraints on the modifications made to the reinforcement: specifically, it requires only that there be at least two bars per edge and that the number of stirrup legs be compatible with the number of longitudinal bars. However, no constraints are imposed on compliance with stress, strength, or cracking checks, which therefore remain the designer's responsibility. In this case, the verification histograms, updated after each modification, are a great help.