
Armor Sheet Sections
The sheet is opened by choosing the Edit|Armature|Sections menu option.
The view allows detailed inspection of all sections of all building elements. It automatically synchronizes with the last element selected in the various 2D or 3D views.
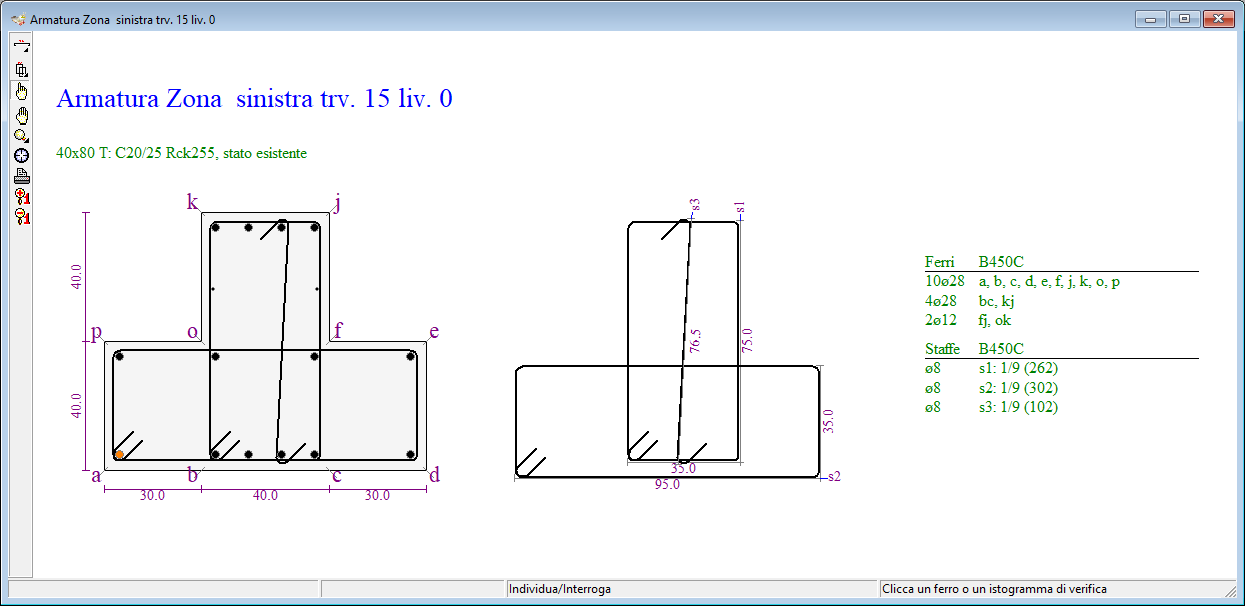
Synchronized Section View on the left side of a beam
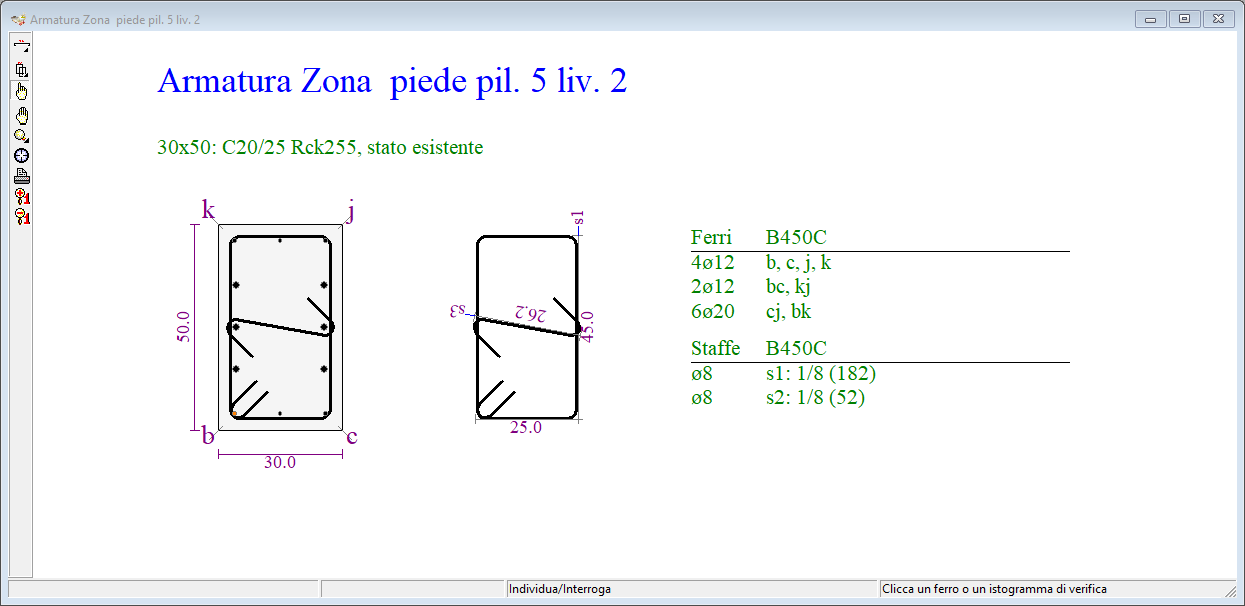
Synchronized section view on the foot area of a pillar
For reinforced concrete sections, the rods in the sections are marked with an alphabetical letter that refers to the iron table for a detailed description.
The areas shown are the foot, midpoint, and head for pillars; and the left, center, and right for beams on the current floor.
The window contains the usual management components, already encountered in other graphic windows:
- the title bar, which displays the reference of the area, element and level;
- the toolbar, with the buttons associated with the work tools;
- the status bar, which displays messages related to the currently selected tool.
The iron table
The iron table provides a detailed description of the longitudinal reinforcement and the stirrups placed in the column.
For each group of longitudinal irons the following are reported:
- the identification letter of the irons in the sections;
- the number of irons and the diameter;
For the brackets the following are reported:
- the number and diameter of the brackets;
- the type of silhouette
- the development length L, in cm;
Toolbar
The Pillars sheet toolbar contains the following buttons:
 Irons Element: Opens the longitudinal irons tool panel.
 Brackets Item: Opens the brackets tool panel.
 Locate Item: Allows you to select an item by clicking it with the mouse and synchronize all open windows with respect to the clicked item.
 Move the drawing: Allows you to move the drawing by clicking and dragging the mouse.
 Zoom: opens the zoom toolbar.
 Default View: Resizes and centers the drawing proportionally to the window size.
 Print Preview: Enables the print preview of the drawing.
 Enlarge fonts: increases the font size of the characters.
 Reduce fonts: reduce the font size of characters.
Change of zone
You can quickly change the level and scroll to the next areas in the beams or pillars by clicking on the buttons on the frequent command bar
 to move to the next area
 to go to the previous area
 to go to the next level
 to go to the lower level
Drawing options
The drawing options are accessible from the popup menu that appears when you right-click on the drawing area or from the keyboard using the
A more general discussion of Drawing Options has been done in Drawing Options, which you can refer to for usage and font sizing criteria for text.
The following figure shows the sheet Drawing Options Sections:
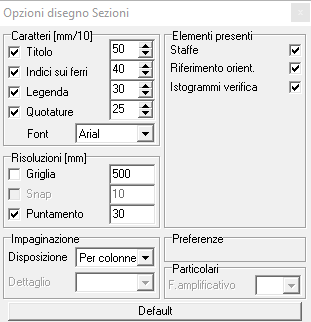
Section Drawing Options